
Getting Started with Smart Pocket
Learn how to create your Smart Pocket account, complete the 5-step onboarding setup, and start tracking your money in minutes.
Getting Started with Smart Pocket
Welcome to Smart Pocket! This guide walks you through creating your account, personalizing your 5-step onboarding wizard, and exploring your new financial dashboard.
What this feature helps you do
Smart Pocket is designed to make personal and shared money management effortless without complicated accounting jargon.
It helps you:
Create a secure account in seconds using Google or your email.
Set your preferred language, local currency, and income cycle.
Start tracking daily expenses, bank balances, and bills right away.
Step 1: Create your Smart Pocket Account
Go to 1smartpocket.com and tap Get Started or Create Free Account. You can sign up in two easy ways:
Continue with Google: One-click sign-up using your existing Google account.
Sign up with Email: Enter your Full Name, Email address, and create a secure Password (at least 8 characters with a number or symbol), agree to the Terms, and tap Create Free Account.
Step 2: Complete the 5-Step Setup Wizard
Once your account is created, Smart Pocket guides you through a quick 5-step personalization wizard:
Step 1 — Welcome:
Enter your Full Name (used for your dashboard greeting, e.g., "Good afternoon, Ali!").
Select your Country (e.g., United Arab Emirates).
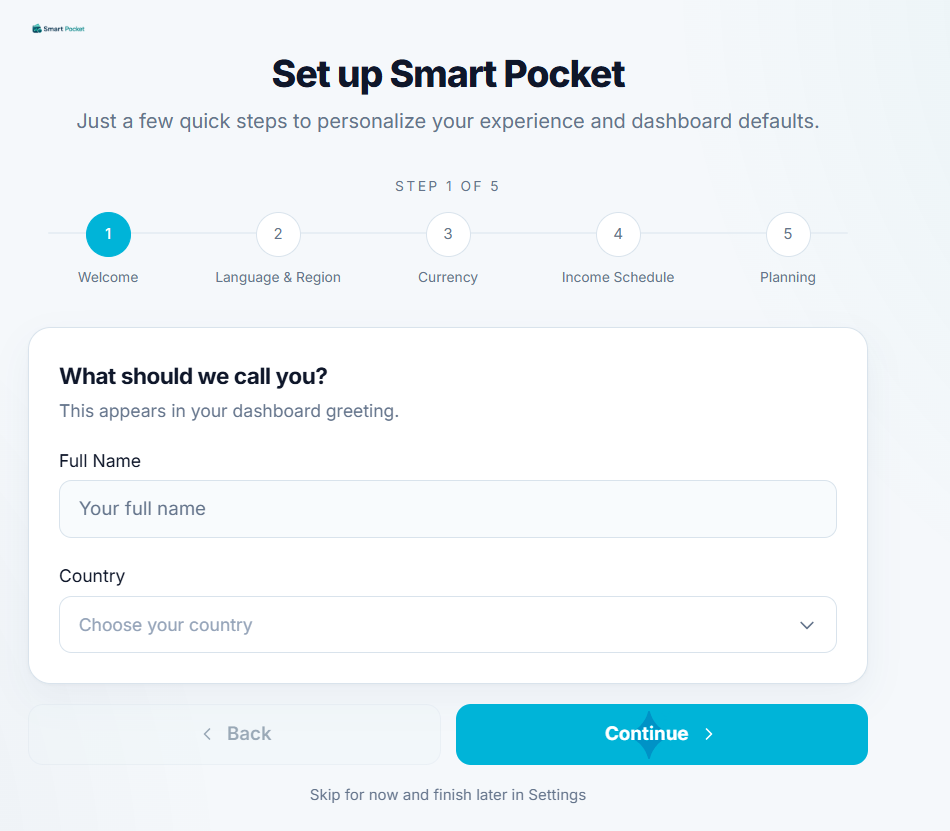
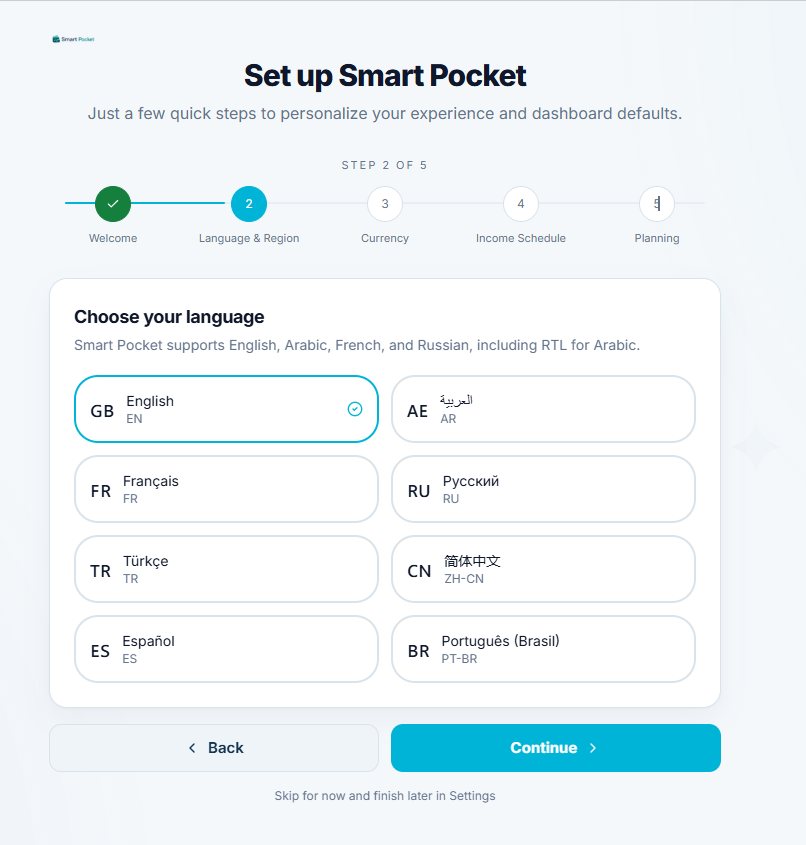
Step 2 — Language & Region:
Choose your preferred language:
English, العربية (Arabic with full RTL support), Français, Русский, Türkçe, 简体中文, Español, or Português.
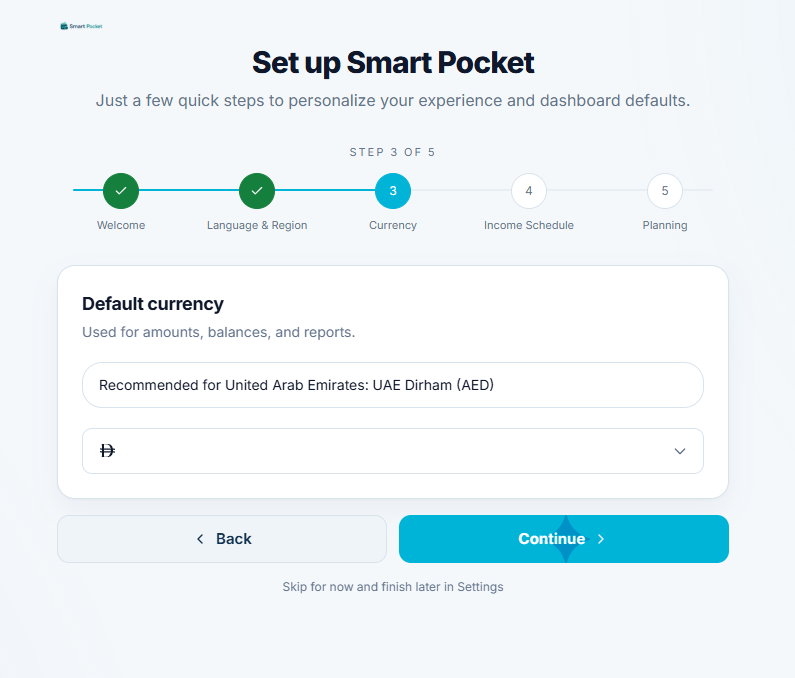
Step 3 — Default Currency:
Select the primary currency for your balances and reports (e.g., AED — UAE Dirham, USD, EUR, GBP, SAR, INR, etc.).
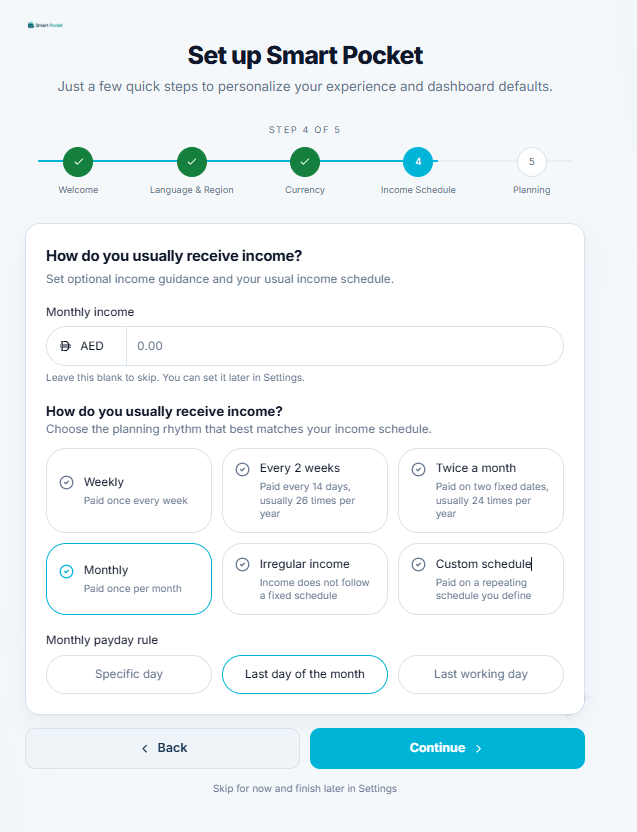
Step 4 — Income Schedule & Payday:
Enter your approximate Monthly Income (optional).
Choose your income rhythm:
Monthly, Weekly, Every 2 weeks, Twice a month, Irregular income, or Custom schedule.
If Monthly, choose your payday rule:
Specific day (e.g., the 25th), Last day of the month, or Last working day.
Step 5 — Planning Preferences & Review:
Choose how your dashboard opens:
Current pay period or Current month.
Set your Week start day (Monday or Sunday) and confirm your Timezone (e.g., Asia/Dubai).
Review your setup summary and tap Finish.
(Note: You can also tap "Skip for now" and adjust these settings anytime in Settings.)
Step 3: Your First Steps on the Dashboard
After setup, Smart Pocket automatically creates your default Cash and Bank accounts with an initial balance of 0.00.
Update Starting Balances:
Tap on Accounts in the sidebar to enter what is currently in your bank or wallet.
Log your first transaction:
Use the quick Money In / Money Out buttons or tap Smart AI (
Type it,Say it, orUpload receipt).
Set up a Category Budget:
Tap Add Category Budget on the dashboard to cap your monthly spending on groceries or dining.
Practical Examples
New UAE resident sign-up:
You sign up with Google, choose English, select UAE Dirham (AED), set your salary date to the 27th of each month, and choose your dashboard to open in Current pay period.
Your dashboard immediately matches your real salary cash flow.
Helpful Tips
Everything can be updated later:
If your salary date or currency changes, go to Settings anytime to update your preferences.
Log daily:
Taking 5 seconds after each purchase to say or type an expense into Smart AI keeps your balances 100% accurate.
Related Features
Dashboard Overview — Learn how to navigate your home screen widgets.
Add Transactions with Smart AI — Discover voice, text, and receipt scanning.
Managing Accounts and Transfers — Add credit cards and extra bank accounts.